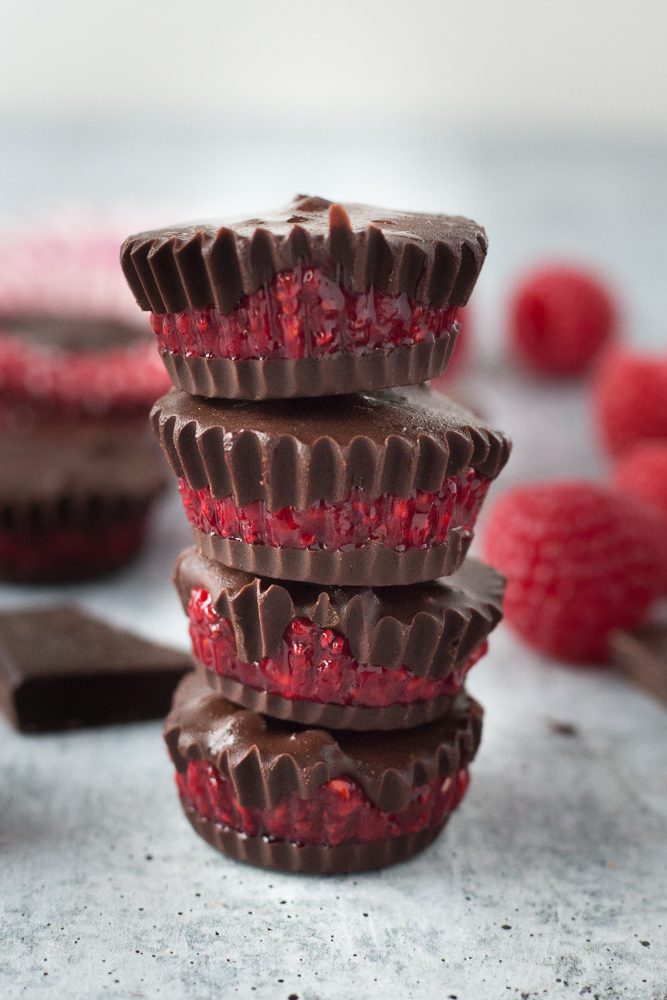
Easy dark chocolate cups stuffed with a raspberry chia jam filling. Make them for a quick dessert or Valentine’s Day treat!
Lately, I’ve been contemplating love.
It’s almost Valentine’s Day and while I’m not out of the house much to see the teddy bears and flowers at the forefront of ever store, I feel the build up.
So my brain is all red roses, chocolate truffles, and candied hearts right now.
And I’ve been reframing and redefining what it means to truly love someone or something.
Because it’s more than the Oxford Dictionary’s “a great interest and pleasure in something” or “an intense feeling of deep affection”.
I think there’s a massive element of surrender involved, whether it’s to a hobby, a best friend, or a partner.
It’s to care endlessly and effortlessly without expectation, conditions, or control.
To adore just because; because you do, because you can, because you are…love.
Leaning into love doesn’t look or feel logical, whether it’s fondness for a passion, place, or person.
But then again, if we’re being honest, what did logic ever have to do with love?
It’s a hard but liberating thing to be that bold and unafraid with your heart of hearts.
What isn’t hard, however, is to fall truly madly deeply in love with this new dessert recipe.
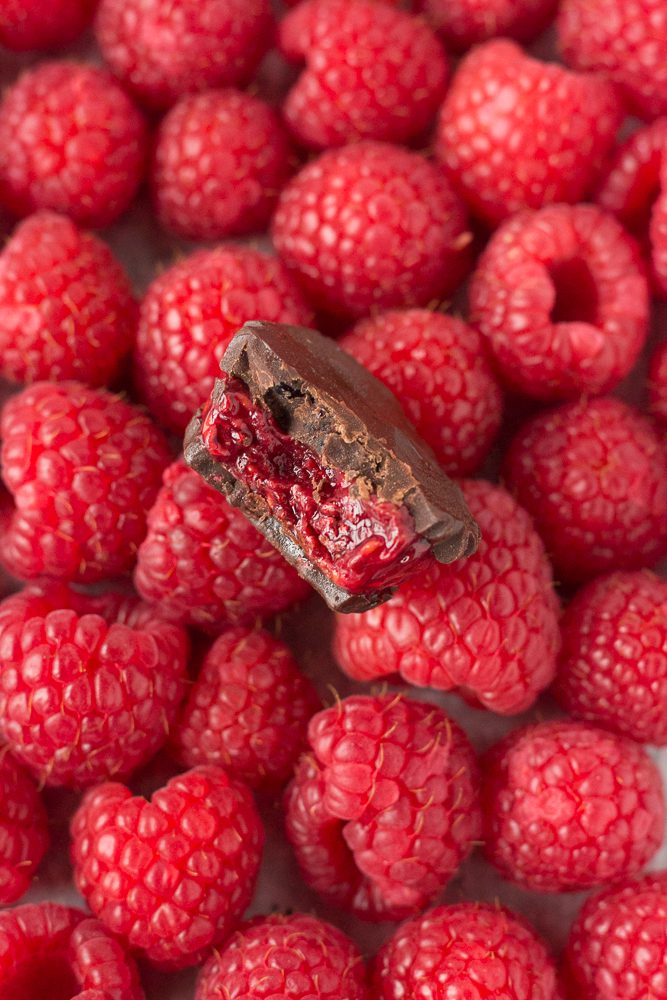
You’re going to fall head over heels for these Chocolate Covered Raspberry Chia Cups.
Let’s be fearless with our feelings and make these easy dark chocolate cups are stuffed with a refined-sugar-free raspberry chia jam filling.
Ready to be totally Twitterpated?
These Chocolate Covered Raspberry Chia Cups were inspired by my Easy Sugar-Free Raspberry Chia Seed Jam.
It’s tart, mildly sweet, and gooey.
Chia seeds thicken it up into a nice jammy consistency that’s perfect for spooning on breakfast.
So, what if we encased it in chocolate?
Let’s see…
What You Need for the Raspberry Chia Jam
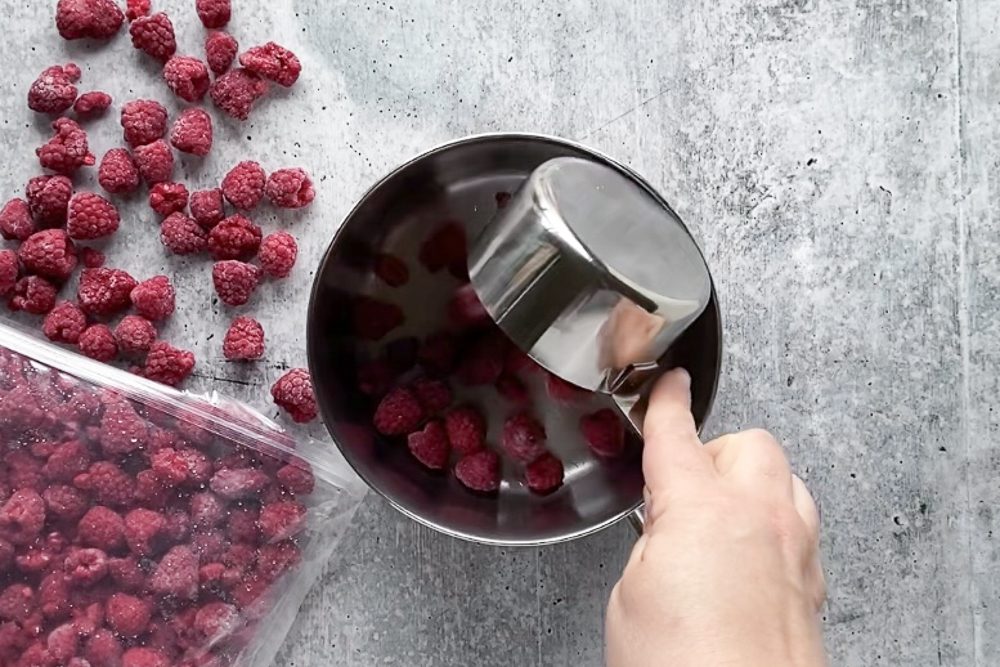
For the Raspberry Chia Jam you need:
- frozen raspberries
- chia seeds
- maple syrup
- lemon juice
That’s it!

How to Make Raspberry Chia Jam
For this raspberry chia seed jam I used my original recipes plus a touch of maple syrup for more of a dessert-feel.
You can leave this out for a lower sugar option!
Add the raspberries to a saucepan over medium heat.
I used frozen raspberries for this recipe but fresh works, too,
If you prefer to use another fruit, try blackberries, cherries, or strawberries instead.
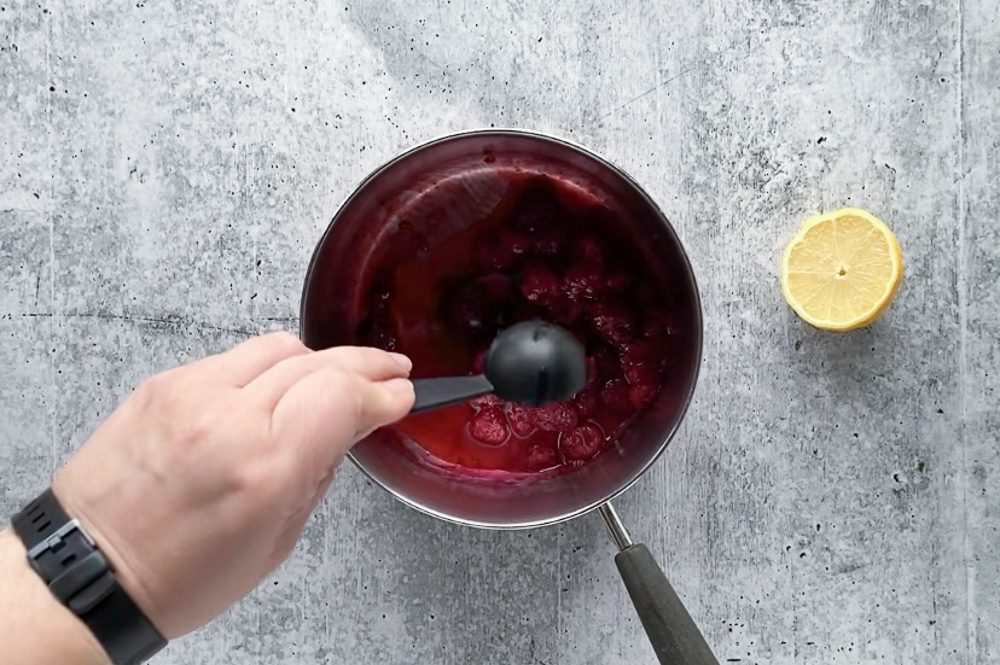
Once the fruit begins to soften and disintegrate, add in the optional maple syrup and lemon juice.
Reduce the heat to low and allow the mixture to simmer for 8-10 minutes, until bubbling, warm, and thickened.
Turn off the heat and stir in the chia seeds, then allow the mixture to sit for ~5 minutes for the seeds to expand.
You should have a sticky sweet spoonable jam.
So now let’s move on to the chocolate.

How to Make Chocolate Cups
For the Chocolate Cups you need:
- Endangered Species Oat Milk Mixed Berries + Dark Chocolate
- coconut oil (optional)
- mini muffin liners
That’s it!

Endangered Species Chocolate
I used Endangered Species Oat Milk Mixed Berries + Dark Chocolate to create the chocolate encasing for these cups.
I’m *really* excited to work with Endangered Species chocolate on this recipe.
When I first went vegan, their bars were the first I picked up at the grocery store and discovered with delight that they were 100% vegan.
Their chocolate helps to support species, habitat, and humanity across the globe by donating 10% of their annual net profits to conservation organizations.
Today I’m sharing with you their new dark chocolate bars made with 75% cacao and oat milk and lower sugar!
I chose the Endangered Species Oat Milk Mixed Berries + Dark Chocolate to echo the tartness of the raspberry filling in the middle.
This bar combines 75% dark chocolate and the sweetness of oat milk infused with a bountiful harvest of fresh mixed berries.
It’s the perfect balance of sweet, tart, and chocolate-y, with a popping berry texture!
You’re going to love the way it compliments these cups.

How to Melt the Chocolate
I know the bars are beautiful and delicious as is, but for this recipe we have to melt them down.
Add the chopped chocolate to a medium saucepan and heat over low heat until they’re full melted.
If the chocolate gets too thick add a tiny bit of coconut oil to thin things out.
I found I didn’t need to add any to my recipe.

How to Make Chocolate Covered Raspberry Chia Cups
Line a mini muffin baking tin with mini muffin liners or arrange them on a flat plate.
We don’t need to do any baking for this recipe, but the muffin tin helps preserve the cups form during the creation process.
This recipe is all about the steps and the layers and adequate freeze time.
Make sure you allow ample time to freeze between layers to ensure that cups retain their chocolate berry integrity!
So, let’s get layering.
Drizzle the melted chocolate into the liners (enough to cover the bottom) then transfer them to the freezer for 10-15 minutes to set.
Remove the tin from the freezer and make sure the chocolate is cooled.
Top the chocolate layer with a heaping teaspoon of the raspberry chia seed jam– you can eyeball it, here!
Pop the tin back in the freezer to harden for another 10-15 minutes.
At this point, you’ll probably need to reheat the chocolate for it to be drizzly again.
Remove the cups from the freezer and top with another teaspoon of melted chocolate to cover the top.
Transfer the cups back to the freezer to harden completely.
Ta-da!
How to Serve Chocolate Covered Raspberry Chia Cups
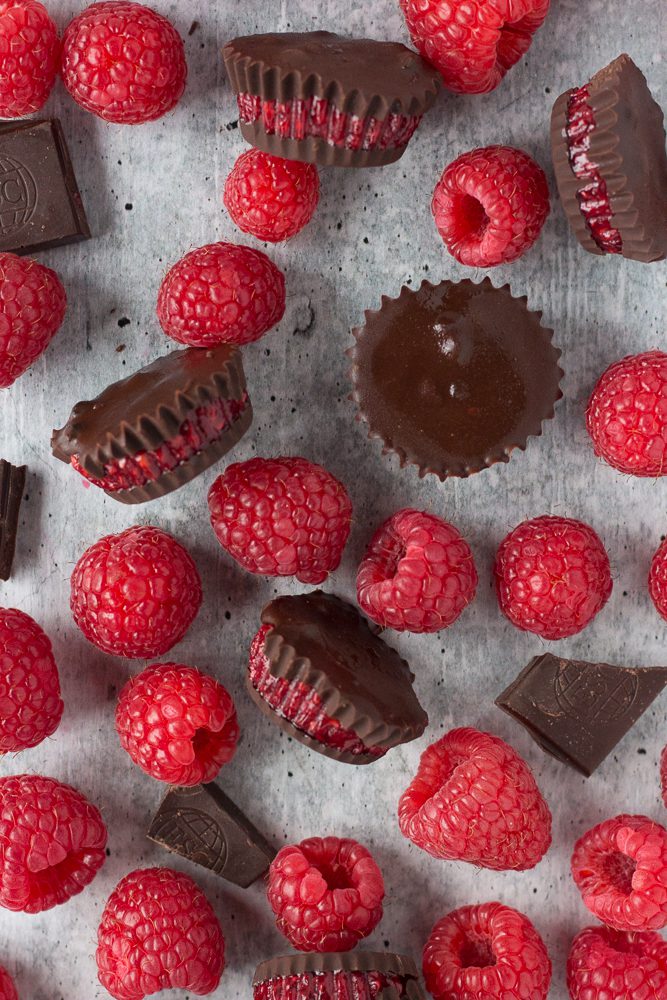
Enjoy these Chocolate Covered Raspberry Chia Cups as a quick no-bake treat!
The combination of red raspberries and dark chocolate is perfect for a special occasion.
Make them for an easy dessert or Valentine’s Day treat for yourself or to share with your special someones.
If you have leftover raspberry chia jam, try spreading it on toast, rice cakes, crackers, or on pancakes, ice cream, yogurt, or oatmeal.
I like to make a batch to store in the freezer for anytime dessert-ing!
If you don’t have mini muffin liners, you can also use regular muffin liners and make several large cups instead of man minis!
They freeze well and the raspberry jam and chocolate taste delicious when chilled.
Enjoy!

More Vegan Chocolate Cups
-
Dark Chocolate Coconut Butter Cups
-
Superfood Chocolate Maca Cups
-
Chocolate Strawberry Cups
-
Chocolate Caramel SunButter Cups
I Want to Hear From You
If you make this Chocolate Covered Raspberry Chia Cups recipe, let me know!
Be sure to leave me a comment, rating, and review so I can use your feedback to create more yums.
Give me a shout on Instagram and use #floraandvino to show me your creations.
Check out my Pinterest page to pin more recipes like this one to make later.
Love this post and want more? Go to my homepage and subscribe to get updates delivered right to your inbox!
XO Lauren


Chocolate Covered Raspberry Chia Cups
- Total Time: 45 minutes
- Yield: 12-16 cups
- Diet: Vegan
Description
Easy dark chocolate cups stuffed with a raspberry chia jam filling. Make them for a quick dessert or Valentine’s Day treat!
Ingredients
Raspberry Chia Jam
- 1 cup frozen raspberries
- 1 TBSP chia seeds
- 1 TBSP maple syrup
- 1 tsp squeezed lemon juice
Chocolate Cups
- 2 cups Endangered Species Oat Milk Mixed Berries + Dark Chocolate, chopped
- ½–1 tsp coconut oil (optional)
- 12–16 mini muffin liners
Instructions
- First, prepare the chia jam. In a small saucepan over medium heat, add the frozen raspberries. Once the fruit begins to melt, add in the chia seeds, maple syrup, and lemon juice. Reduce the heat to low and allow the mixture to simmer for 8-10 minutes, until bubbling, warm, and thickened.
- Turn off the heat and stir in the chia seeds. Allow to sit for 5 minutes for the seeds to expand. Set aside.
- Add the chopped chocolate to a medium saucepan and heat over low heat until full melted. Add ½ tsp coconut oil if the chocolate gets too thick.
- Line a mini muffin baking tin with the mini muffin liners or arrange them on a flat plate. Place a teaspoon of chocolate in each cup (or enough to cover the bottom), then transfer to the freezer for 10-15 minutes to set.
- Remove the tin from the freezer and top the chocolate layer with a heaping teaspoon of raspberry chia seed jam. Place back in the freezer to harden for another 10-15 minutes.
- Remove the cups from the freezer and top with another teaspoon of melted chocolate to cover the top. Transfer the cups back to the freezer to harden completely.
- Store leftover cups in the fridge and freeze for long term storage.
Notes
Recipe adapted from Talia Polluck, Party In My Plants: Wussup, Chocolate-Covered Chia Jam Cups
- Prep Time: 15 mins
- Cook Time: 30 mins
- Category: Dessert
- Method: Stovetop, Freezer
- Cuisine: Vegan, Gluten-Free, Refined-Sugar-Free
This post is brought to you by Endangered Species Chocolate, but all words and eats are my own. Thanks for supporting the sponsors that keep me hungry!
Photography by Hot Pan Kitchen

Leave a Reply