#ad// This post is brought to you by Bare Snacks, but all words and eats are my own. Thanks for supporting the sponsors that keep me hungry!
2-ingredient homemade raw walnut cashew butter made super creamy in under 10 minutes Serve it with Bare Snacks Banana Chips for an easy snack!

Did you pull any epic pranks on April Fools Day?
After one of my aloe plants fell out of it’s pot for the fourth (or fifth?) time last week (it was poorly potted and in a precarious position), I had a plant funeral and buried the evidence in my trashcan.
RIP, aloe.
As part of an April Fools day joke, I purchased a new plant and propped it up on the late aloe’s plant stand on April the first, waiting for M to notice.
I smirked while he ate his breakfast, finally asking, pointedly, “So, do you notice anything different???”
After doing a lingering living room scan, he finally picked out the monstera deliciosa sitting pretty near the window sill.
I laughed, assuring him I would keep my plant murderess tendencies contained.
I’m so infatuated with this little green plant and it’s smooth heart-shaped leaves already turning towards the sunshine.
Let’s see how long it survives…
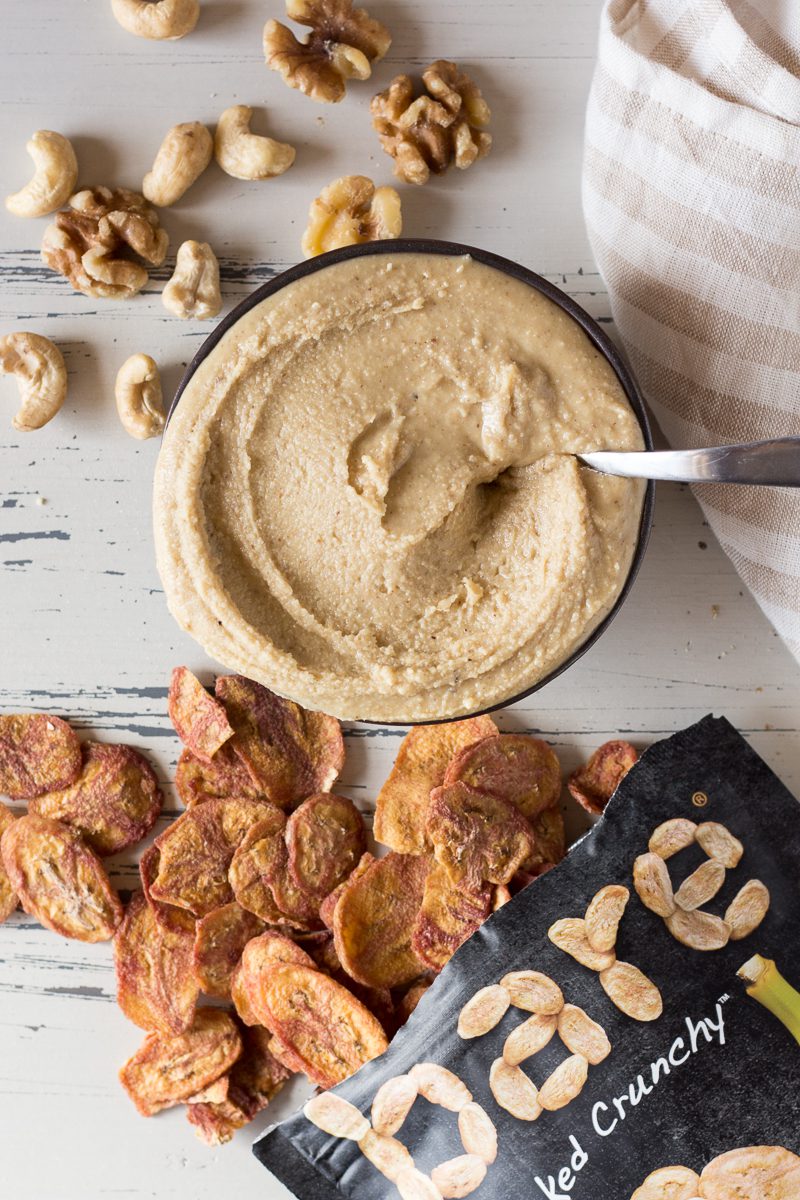
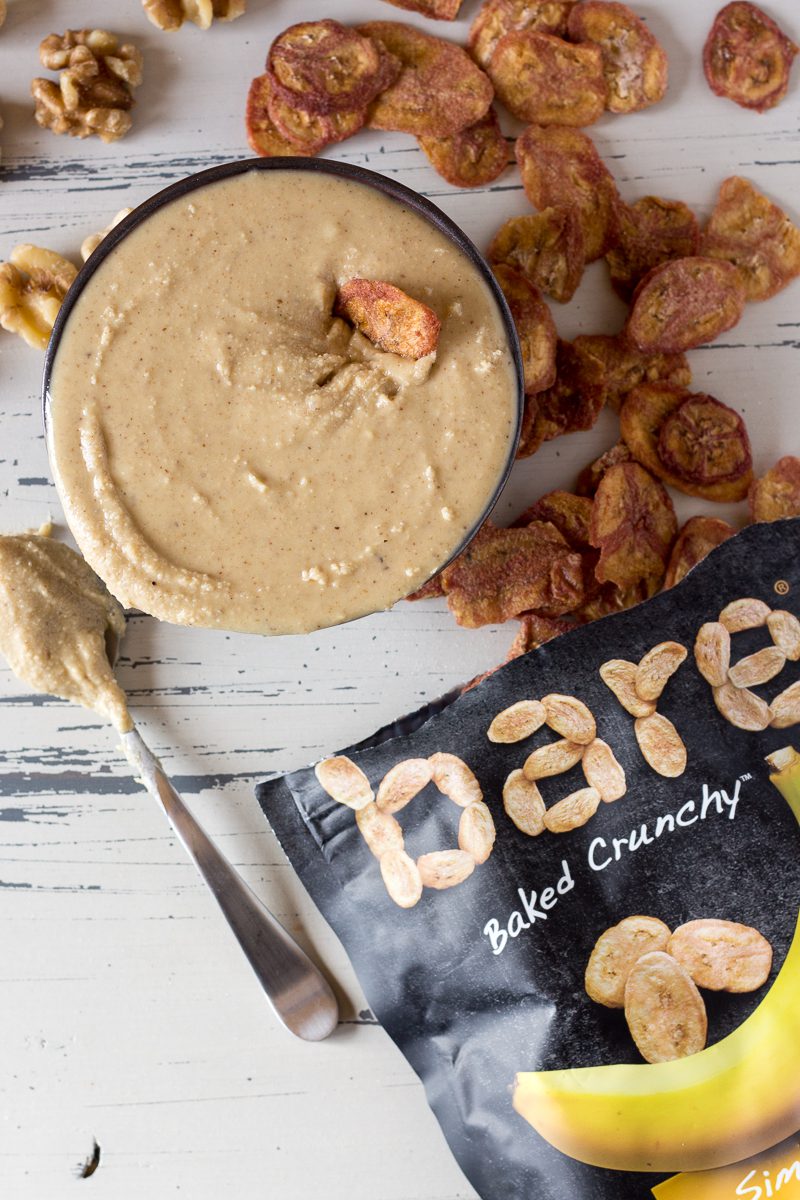
Hopefully longer than this Raw Walnut Cashew Butter that I made last week and served with banana chips.
It requires just two ingredients and a blender without any added sugars or oils.
It’s true: I wouldn’t kid about something as serious as nut butter, not even on April Fools!
Nut Butter Is My Currency
There’s a store-bought walnut butter that functions as its own currency in my house.
I’m pretty sure we could barter and trade our way through house chores and TO-DOs with them.
But most of the time I discretely open the jars and wait for M to find the jar on top of the fridge.
It goes like this: I open the jars, and M finishes them.
And it’s so good, guys.
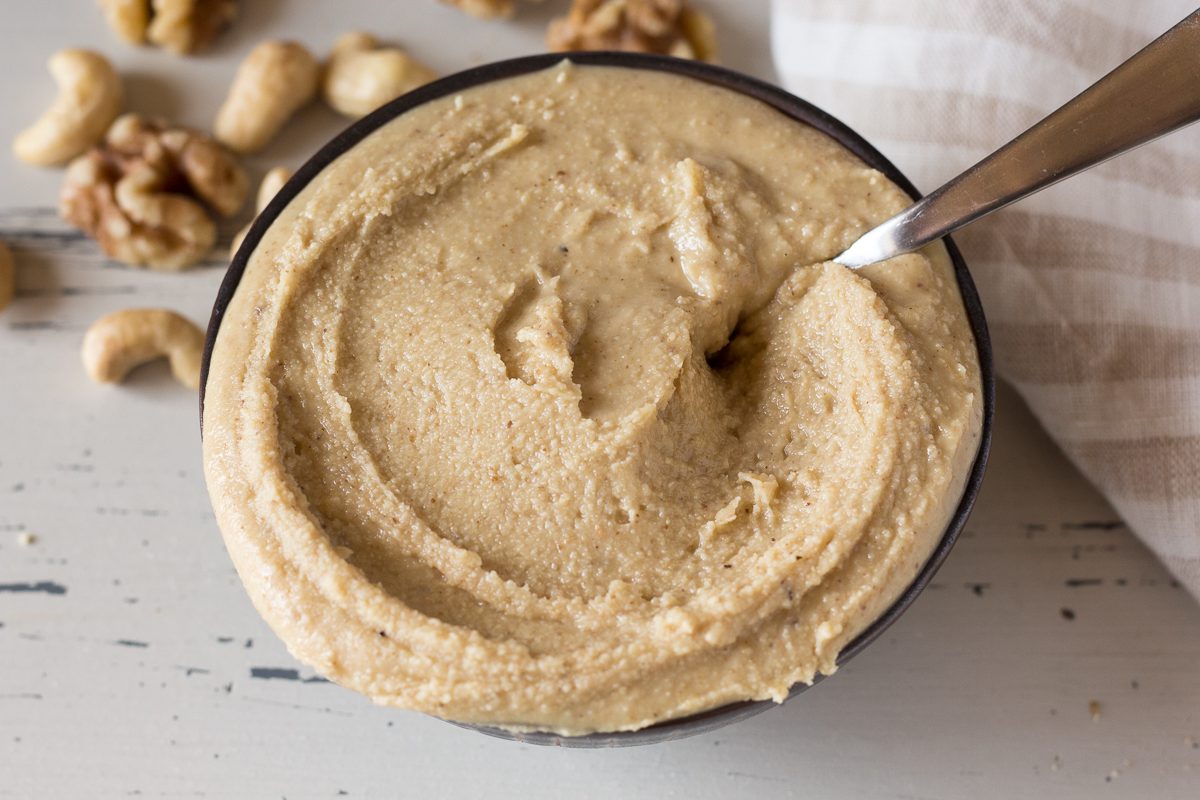
The nut butter is creamy, raw, and organic with just two ingredients.
I finally decided to recreate the nut butter for us so we can both be consistently rich in our supply.
What You Need
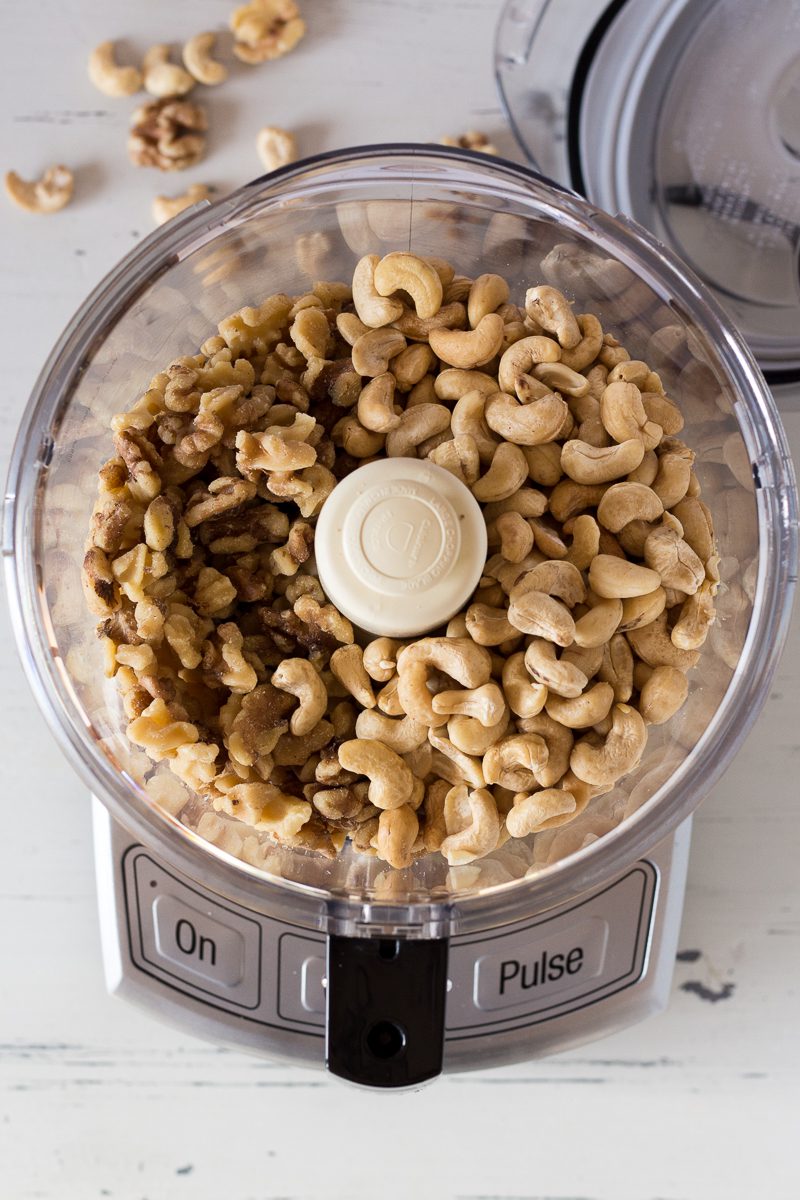
The best walnut butter isn’t just walnuts– it’s a mix of raw walnuts and cashews!
The addition of cashews offsets some of the natural bitterness of walnuts and takes the consistency to a new level of creaminess.
So, here’s what you need:
- raw cashews
- raw walnuts
That’s it!
If you’d like your nut butter to be organic, too, make sure to use organic nuts.
How to Make It
For this recipe, you need a high-speed blender or food processor to create a creamy nut butter.
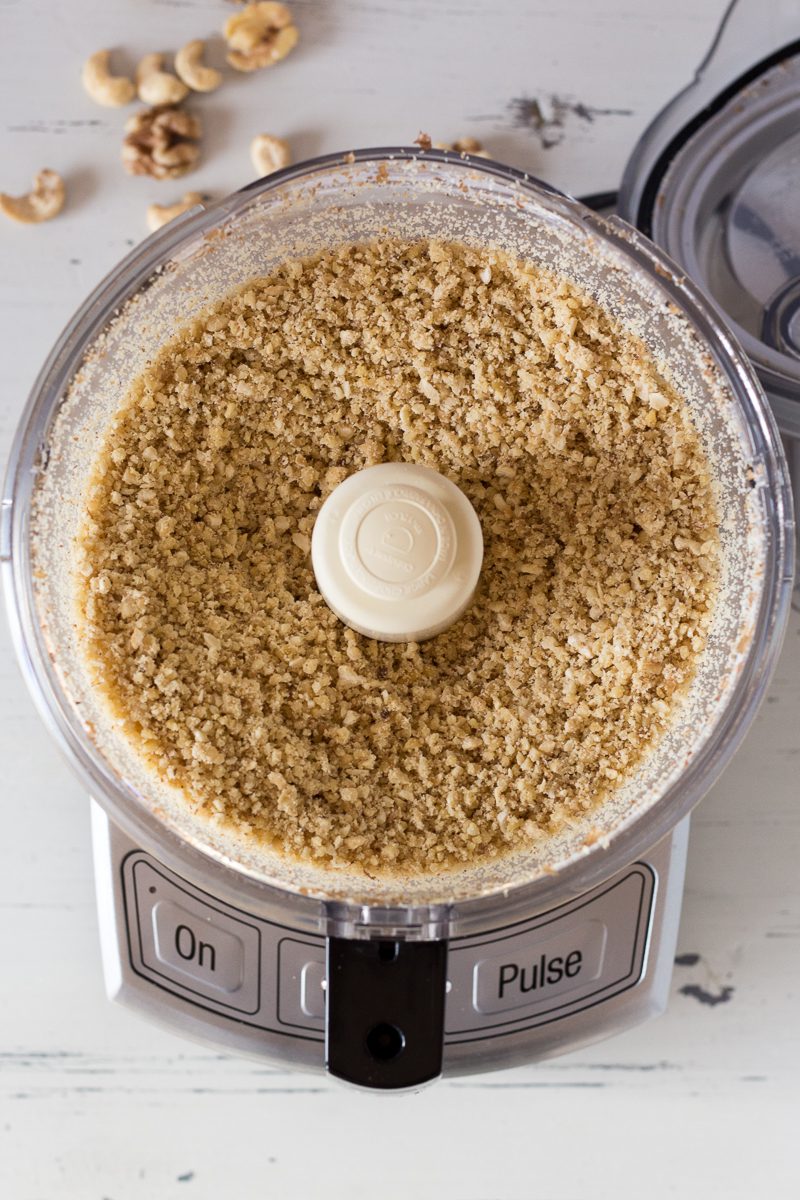
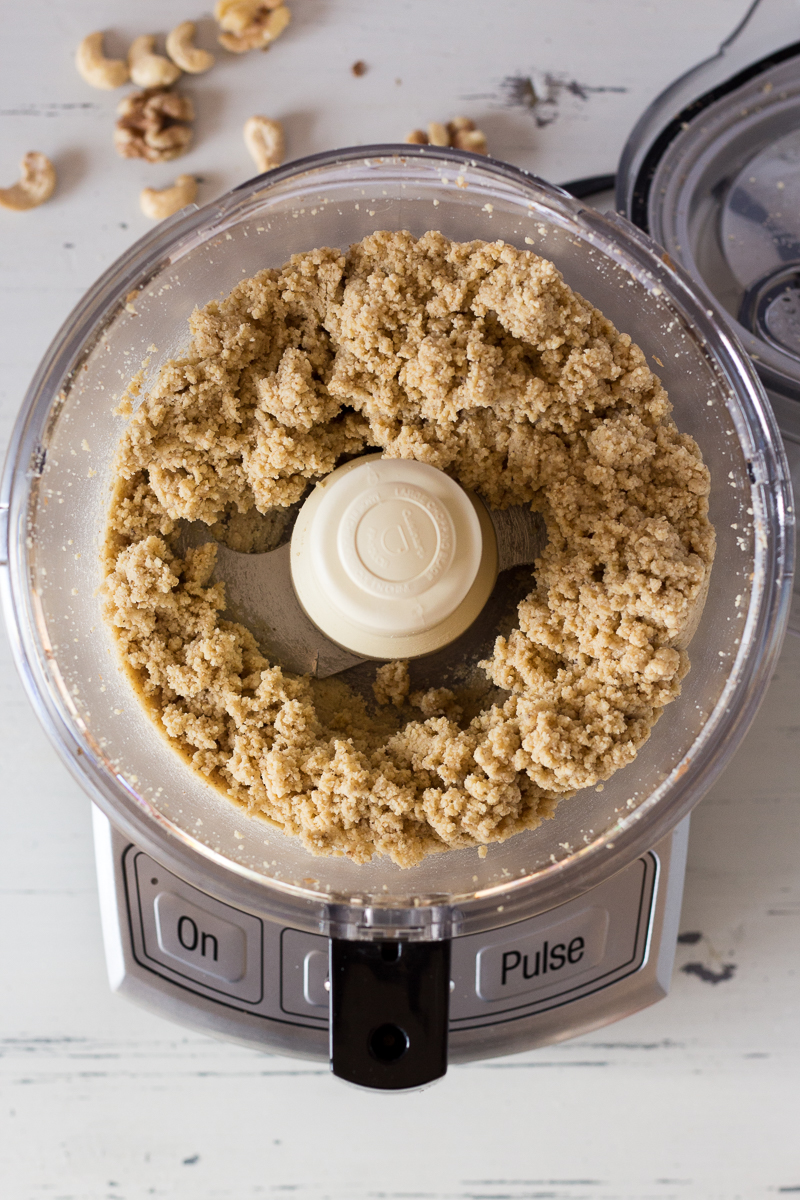
Start on the lowest setting and slowly, gradually increase the speed and power to blend the nuts.
They nuts should go through all of the nut butter-y phases.
First, they’ll look like a crumble, then a flour, then a sticky mixture, and finally, a nut butter.
This entire process will take about 2 to 3 minutes, depending on your blender.
If your blender comes with a toggle, I like to use it to press the ingredients into the blades to encourage quicker blending.
You can also stop the blender and scrape down the side as needed with a spatula or spoon to recombine the contents.
I recommend stopping the machine for temporary pauses so your blender motor doesn’t get overheated.
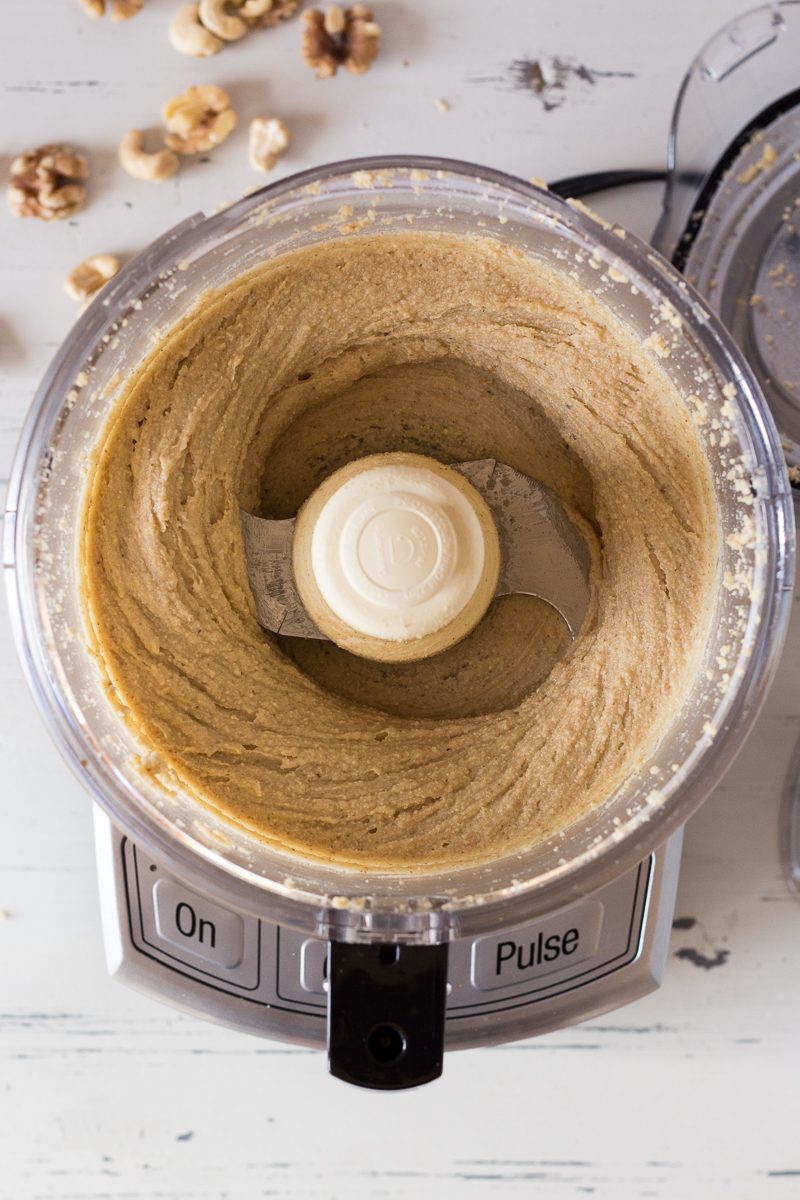
The Raw Walnut Cashew Butter is done when it runs freely through the blades without any nut-clumps!
It should be creamy and slightly runny when you tilt the blender bucket.
I love my nut butter super runny and drizzly!
If you prefer chunkier nut butter, try adding in a handful of raw walnuts and pulsing to achieve a chunkier crunchy texture and consistency.
Nut Butter Pairing
Transfer the nut butter to an airtight container and store it in the fridge for one to two weeks.
I like to store mine in the refrigerator so the natural oils don’t separate, but you can also keep it at room temperature if you don’t mind re-stirring before serving.
If you’re like me, it won’t last very long!
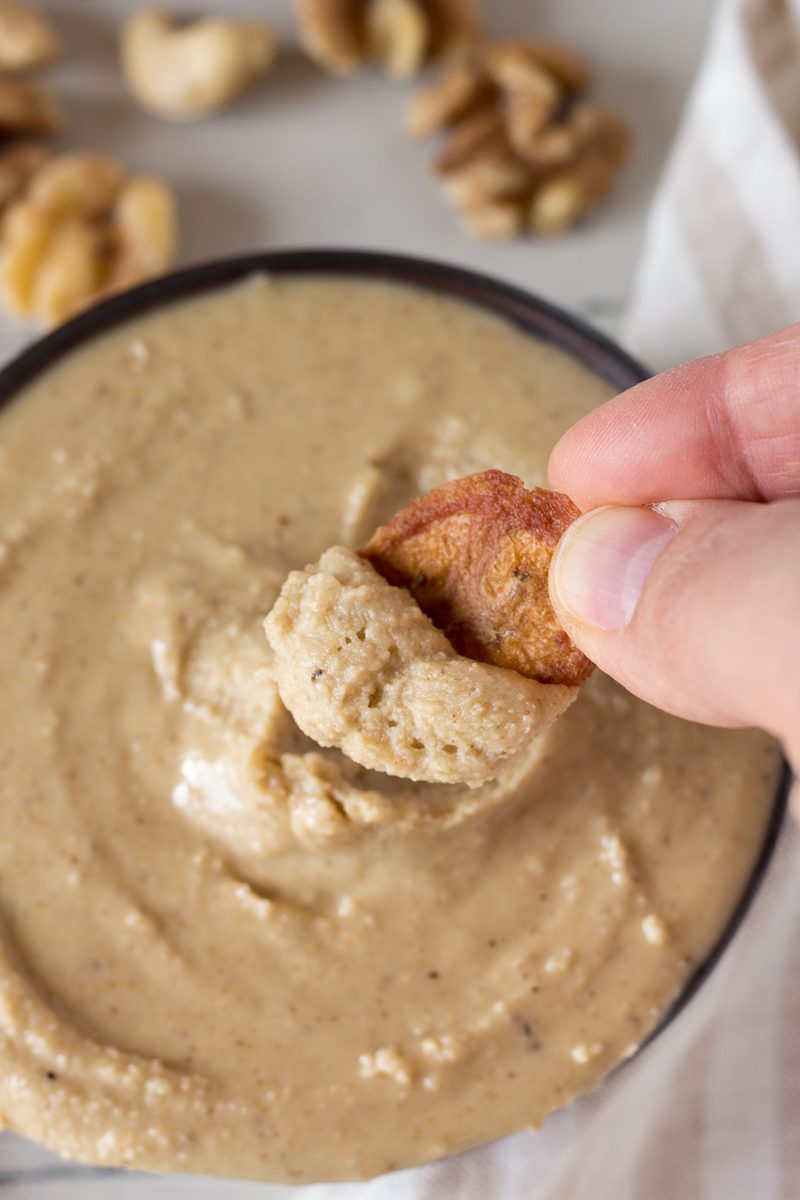
Serve your Raw Walnut Cashew Butter with Bare Snacks Banana Chips for dipping!
These 1-ingredient banana chips are:
- Gluten-free
- No-added-sugar
- Fat-free
- No-added-oil
- No Preservatives
They’re perfect for dipping!
How to Enjoy Raw Walnut Cashew Butter
Enjoy this Raw Walnut Cashew Butter as a fun spread to have on hand for anything.
Pair it with banana chips for a quick no-sugar-added snack bite.
Here are some other ways to enjoy it:
- on toast
- with oatmeal
- in smoothies
- to top yogurt bowl
- on apples
- with pancakes
I also think it would also make a mean nut butter and jelly sandwich.
Enjoy!
If You Make This Raw Walnut Cashew Butter, Let Me Know!
Be sure to leave me a comment, rating, and review so I can use your feedback to create more yums.
Give me a shout on Instagram and use #floraandvino to show me your creations.
Check out my Pinterest page to pin more recipes like this one to make later.
For more nutty dips and spreads, check out my 2-Ingredient Roasted Peanut-Cashew Butter and Pina Colada Peanut Butter.
Come say hi on Instagram and use #floraandvino!
If you haven’t already signed up for my 2021 cookbook updates, be sure to join the list!
XO Lauren

Raw Walnut Cashew Butter
- Total Time: 10 minutes
- Yield: ~2 cups of nut butter
- Diet: Vegan
Description
2-ingredient homemade raw walnut cashew butter made super creamy in under 10 minutes Serve it with Bare Snacks Banana Chips for an easy snack!
Instructions
- Pour the nuts into a high-speed blender (I used a Vitamix) or a food processor.
- Starting on the lowest setting and gradually increasing in speed and power, blend the nuts. They should go from nuts, to a crumble, to a flour, to a sticky mixture, to a butter in less than 2 minutes.
- If using a tamper, use it here to press the ingredients into the blades.
- Stop the machine for temporary pauses as needed if it gets overheated. The nut butter is done when it runs freely through the blades without any nut-clumps.
- Transfer the nut butter into an airtight container and store it in the fridge for up to several weeks.
- Serve the nut butter with simply banana chips for dipping!
- Prep Time: 10 mins
- Cook Time: 0 mins
- Category: Dip, Spread
- Method: Blender
- Cuisine: Vegan, Oil-Free, Gluten-Free, Refined-Sugar-Free
Photography by Hot Pan Kitchen

Leave a Reply